How to Make Bread at Home Without an Oven


Many people wonder if it's possible to make bread without an oven, and the truth is that it is! You can make delicious fluffy homemade bread on your stovetop by using a large pan. In this oneHOWTO article we're going to show you how to make bread at home without an oven.
This recipe makes it nice and quick to make homemade bread to accompany any meal of the day. Follow our recipe to learn how to make the best fluffy and delicious bread using your stovetop. We include images and a video to show you how easy it can be!
Ingredients:
Steps to follow:
Clean and dry the countertop where you will work your bread. It is very important that it is well cleaned, otherwise any dirt will stick to the dough and we don't want that!
Add the flour, yeast, sugar and salt into the bowl. Open a hole in the middle of the flour (like a volcano), and place the yeast and sugar there. Then, put the salt but not in the hole, you must place it separately from the yeast. So, place the salt on one of the sides. Mix the first ingredients very well, without touching the salt. Use a wooden spoon or your hands.
Add ¾ parts of the water in the area without salt. Mix that part very well before unifying everything. Do not use very hot or very cold water, opt for lukewarm water. Very hot water inactivates the yeast and very cold water delays its activation.
Pour in the water little by little. This is so you won't add more than you need. You will know when the dough has reached its ideal point when you notice its consistent texture. It shouldn't be as sticky now.

Sprinkle a little flour on the counter and add your dough on top. Now you can work on your dough with more freedom to achieve the ideal dough mixture for a fluffy and delicious bread.
Knead until you get a very smooth texture. Help yourself with a plastic trowel to work manually. Also throw the dough hard on the counter several times, so the gluten will develop better.

Let it rest for 10 minutes. In this way, the moisture penetrates the flour best, allowing it to acquire the consistency it needs faster and without the need to add more flour on the counter.
Work the dough again this time for only 5-10 minutes. You will notice that after each rest and kneading, it feels more manageable and its texture is much smoother. This is what is going to make your bread soft and fluffy, that's why it's very important you don't skip these steps.
Let it rest for 10 more minutes. Another short break so that the dough can achieve its desired consistency and so it is easier to handle.
Knead for just 1 more minute. In this step, you will see the dough somewhat inflated and, when you work it, it will no longer stick to your hands. Now you are ready for your first long break!
Form a ball, place it in a bowl greased with a little oil and cover it with plastic wrap. The oil and the paper will keep the dough from sticking and drying up.
Let it rest until it doubles in size. This step can take 1-2 hours, sometimes less and sometimes more. It all depends on the climate where you work: cold temperatures take more time and warm temperatures take less time for it to rise. If you live in a cold or drafty place, place the dough near a heat source, or a closed place such as the microwave or oven (it must be off).

Degas the dough. Once your dough has rested, press it gently with the tips of your fingers, over its entire surface. This will degas your dough, releasing any air trapped inside the dough.
Divide it into smaller balls. Cut it with a very sharp knife or with the same plastic paddle that you used to knead.
Next, mold the bread. Fold the edges inward, flip the dough over, and finish rounding the sides. Repeat the procedure with the rest of the dough.
Have a tray or platter dusted with flour ready. Place the balls of dough there, once you have them ready. Cover with a clean cloth.

Wait 30 minutes. This is the second and last long break. During this time, the loaves should grow again.
Heat a skillet. Once hot, lower the heat and soak it with oil. You can do this with a silicone brush or with a piece of absorbent paper. If you have greaseproof paper, cut out a piece that covers the already greased surface, and put it there.
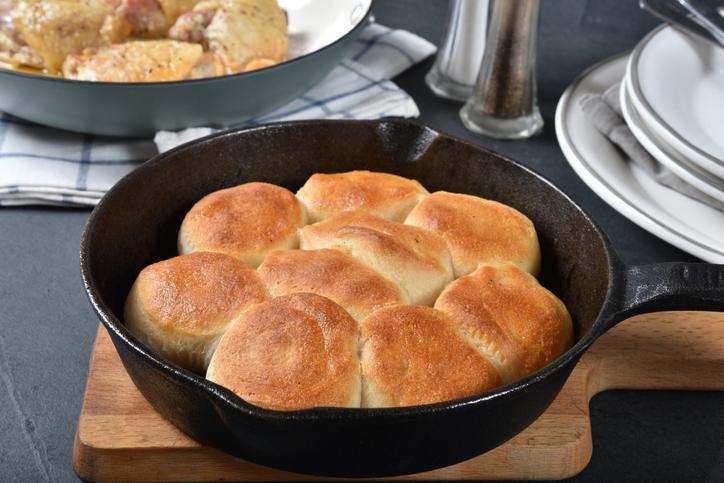
Place the bread in the skillet and cover. If the pan doesn't have a lid, put a lid on it that fits or at least covers it completely. The idea is to prevent the heat from escaping and lowering the temperature. Cook for 12-15 minutes over very low heat.
Wait 12-15 minutes. If you notice that it toasted a lot on the other side, lower the heat further (it all depends on the power of your stovetop). Little by little you will get the hang of it and know how to make no-oven bread to perfection.
Check that the bread is cooked. With a closed fist, tap it gently on the surface, as if you were knocking on a door. If it sounds hollow it is ready, if not you should cook it a little more. Be careful not to leave it for too long and burning it.
Let it cool completely. Put the bread on a rack to cool evenly. And there you have it! Your no-oven bread is ready to be enjoyed!
Once ready, it is convenient to know how to preserve the bread so that it lasts longer. If you have made a lot of bread, do not hesitate to visit the link and discover the best tricks to store it.

If you want to prepare other types of bread, we have a wide variety of recipes so you will never get bored in the kitechen. Check out how to make putok bread, fig bread and cheesy garlic bread.
You can also watch and follow the video below to make homemade bread without an oven!

If you want to read similar articles to How to Make Bread at Home Without an Oven, we recommend you visit our Recipes category.
Tips
- Do not use too much flour, as the bread is very compact, sandy and heavy.
- The secret of bread is in the kneading. Knead it enough and properly to have soft and fluffy bread!
- In this recipe, you can replace dry yeast with 15 grams of fresh yeast.
- If you are using fresh yeast, you must activate it before adding it in.


